&Jog Swivel Spring and Guide Cup ReplacementUpdated 2 years ago
REPAIR GUIDE
UPDATED MARCH 2024
Kit Contents
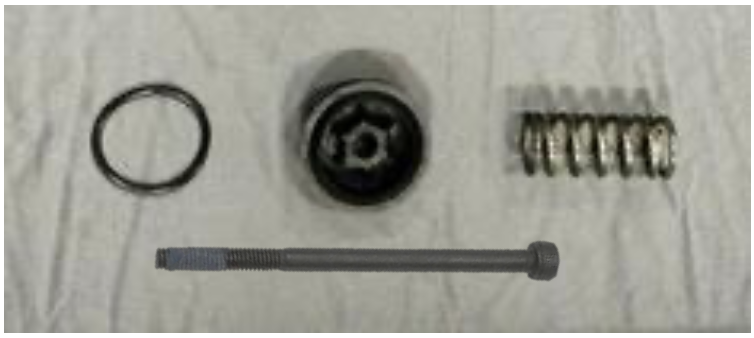
- O-ring
- Top Guide Cup
- Spring
- Partially threaded M8 screw
Required Tools
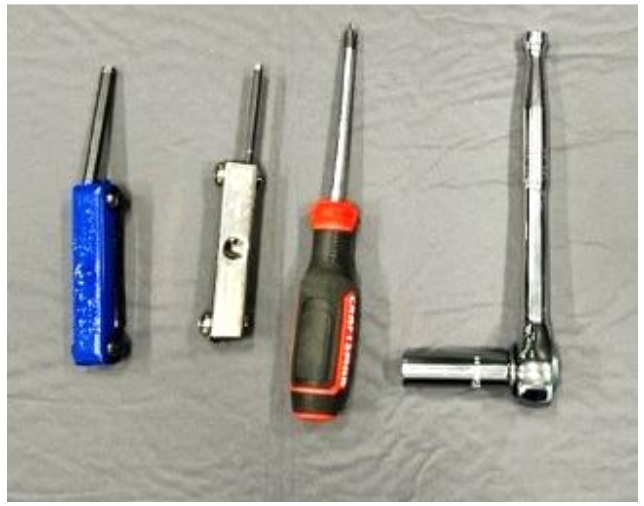
- 6mm hex wrench
- 4mm hex wrench (x2)
- Phillips head screwdriver
- 13mm deep reach socket and ratcheting wrench
Procedure
/01: Remove the swivel wheel from the fork.
Use 2x M4 hex wrenches to remove the axle screws. Then, remove the wheel by spreading the fork legs to remove the wheel.
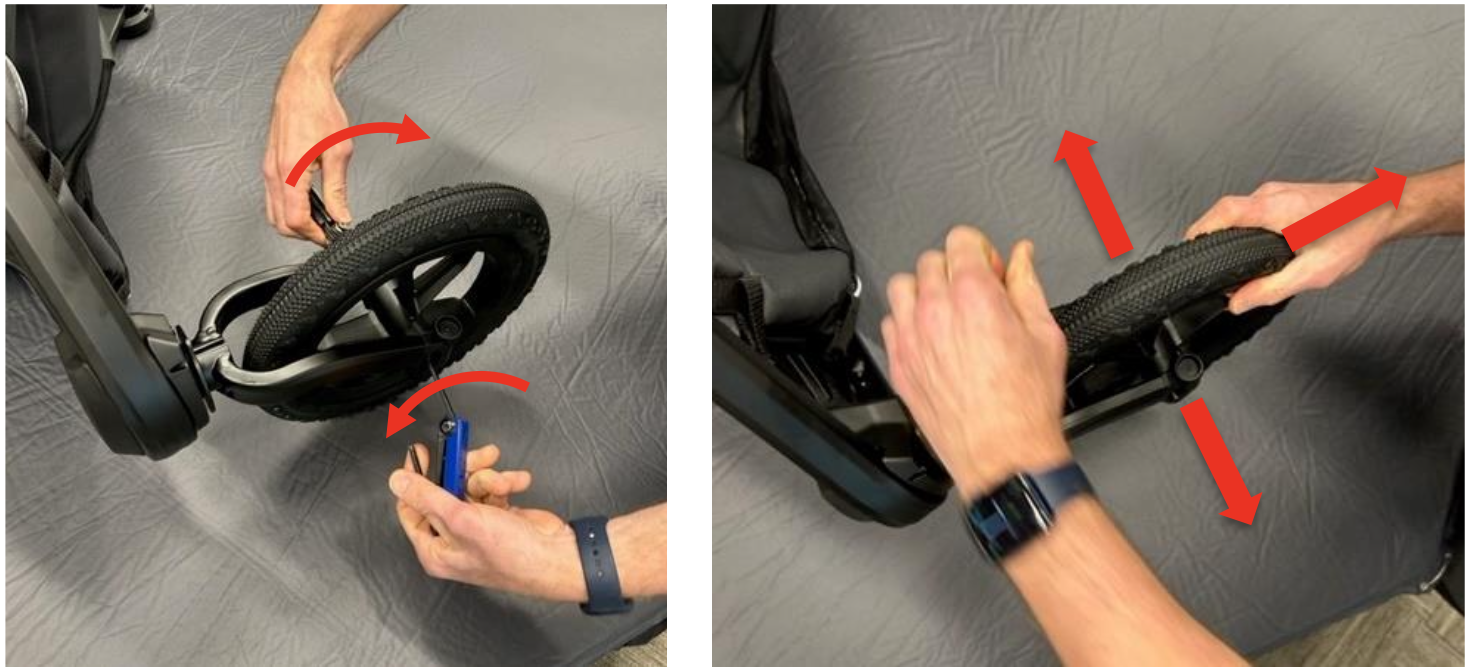
Note: There’s an oblong washer on the short screw side, and a regular round washer on the long screw side, set aside as they will be needed re-assembly.

/02: Remove the front fork pre-load hardware.
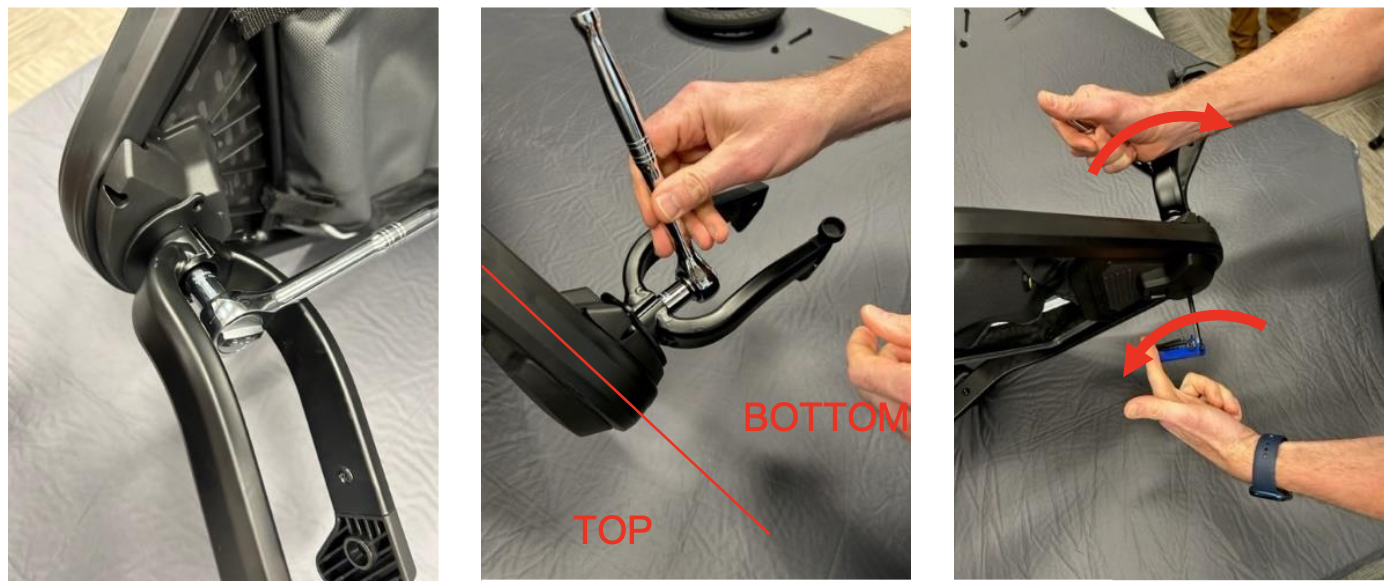
There are 6 components:
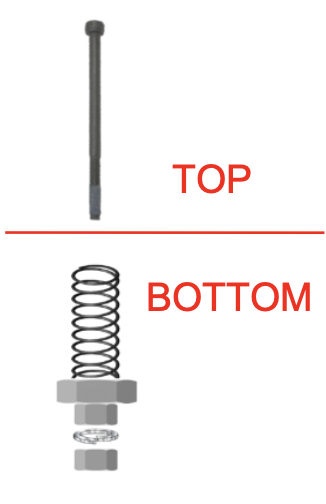
Top side of the swivel wheel assembly
1x M8 socket head cap screw (pre-load adjustment screw)
Bottom side of the swivel wheel assembly (inside of the fork stem)
1x pre-load spring
1x large Aluminum nut
1x M8 nut
1x lock washer
1x M8 lock nut (Nyloc)
Remove the M8 lock nut and the lock washer. Next, remove the second M8 nut (this is not a lock nut). Once the M8 nuts are removed, rotate the M8 bolt counterclockwise until the large Aluminum nut and spring fall out and set the parts aside for re-assembly. The M8 bolt will be replaced with the one in the kit.
Note: The fork may slide out the jogger, try to keep installed throughout the process for easier re-assembly.
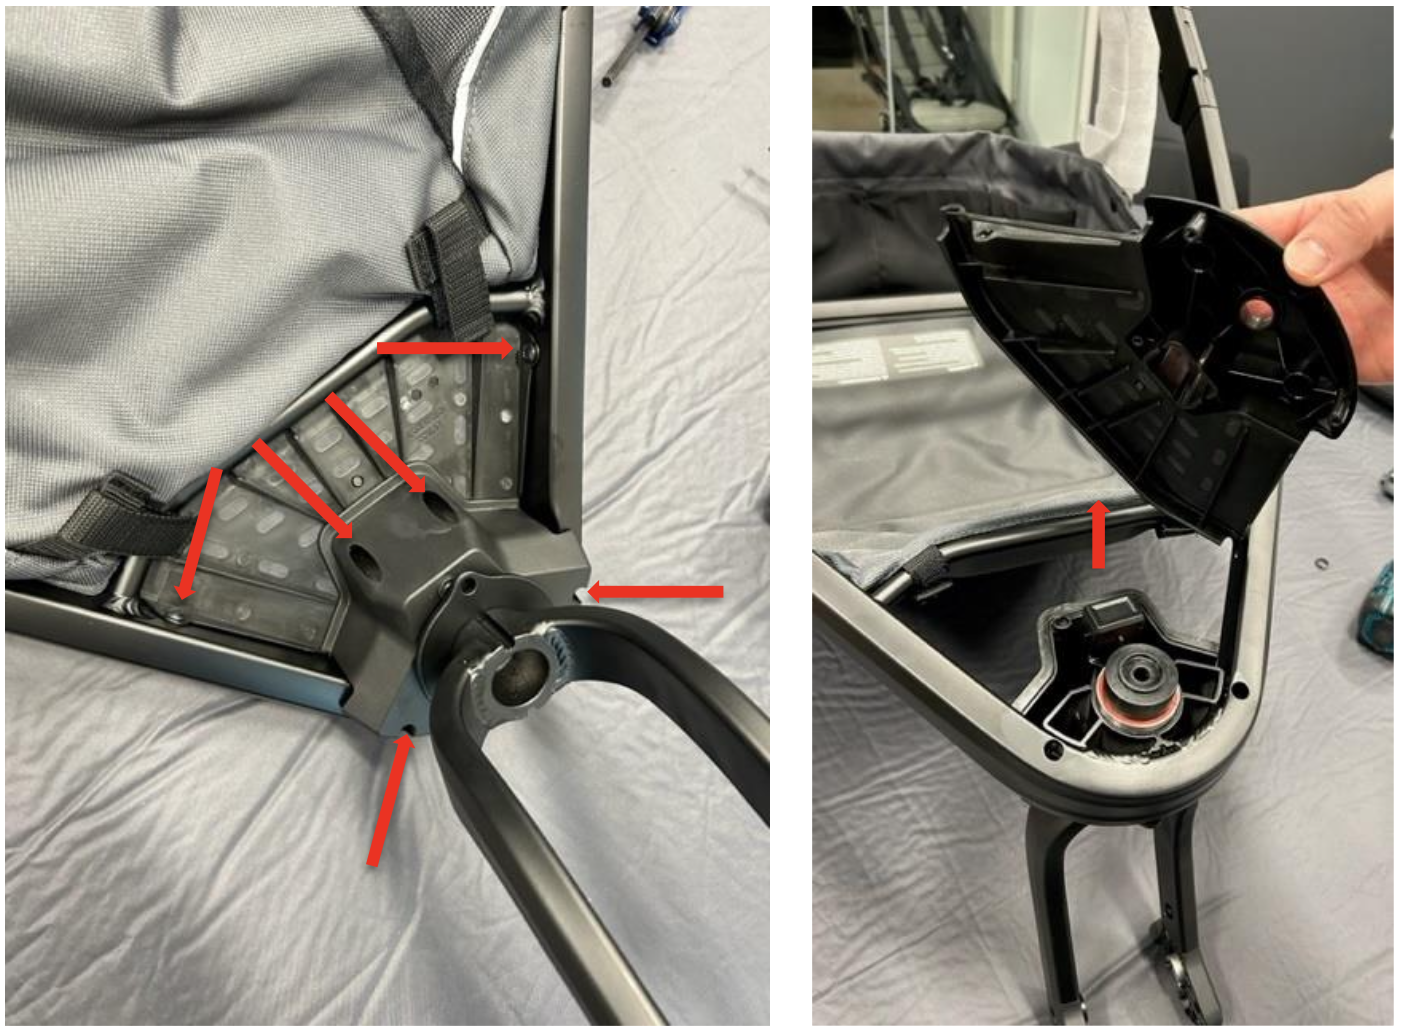
/03: Remove plastic cover.
Use the Philips head screwdriver to remove the (6) screws shown on the lower housing. Next, remove the front plastic cover (on topside).
/04: Remove existing guide cup.
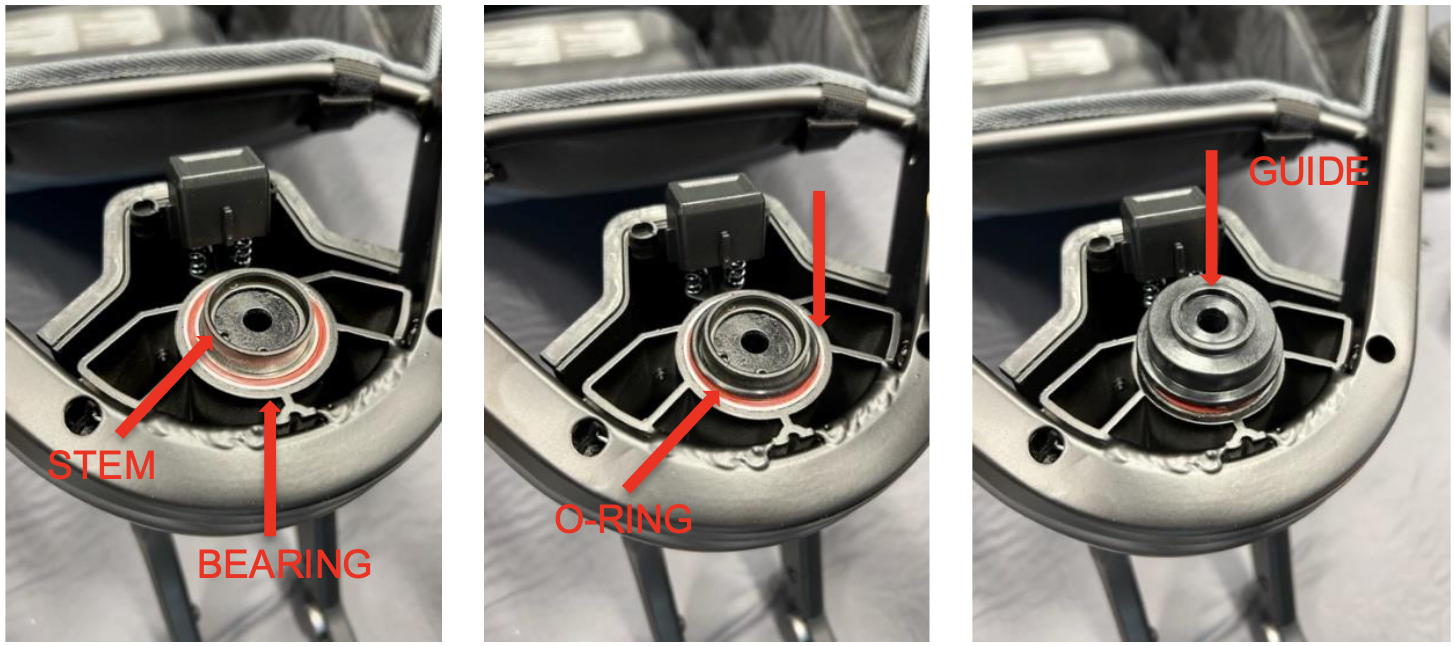
Pull it up and off. You will be replacing it with a new one in the kit.
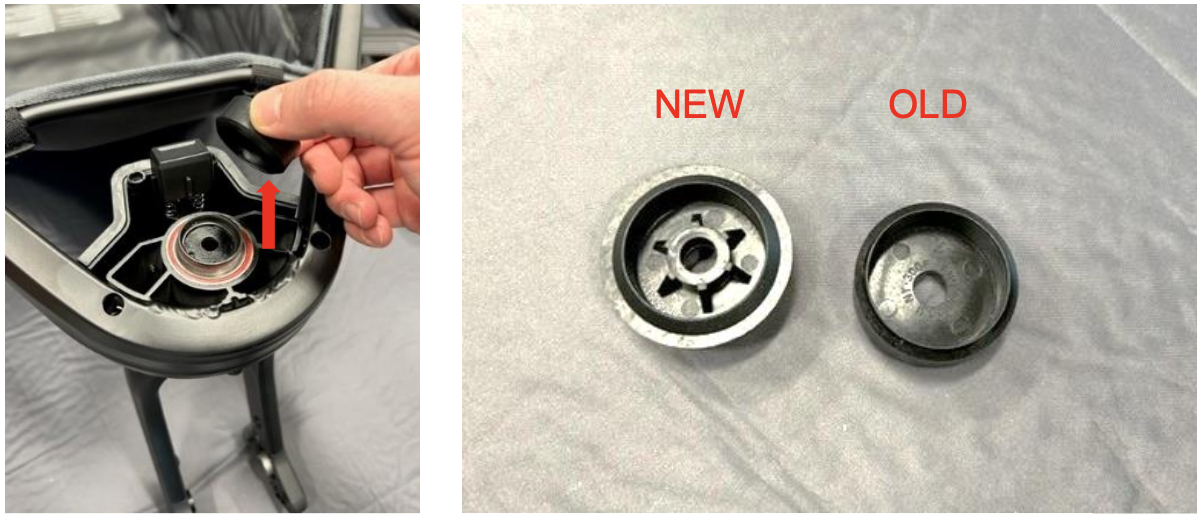
/05: Add o-ring and replace guide cup.
Place the kit O-ring on the top of the stem so that it lays flat on the top surface of the bearing (middle image). Next install the new guide cup by sliding on the top of the fork stem (right image).
Careful! These new parts are held by the plastic cover and fork fastening hardware. Do not let them shift as you re-assemble.
/06: Reassemble the components.
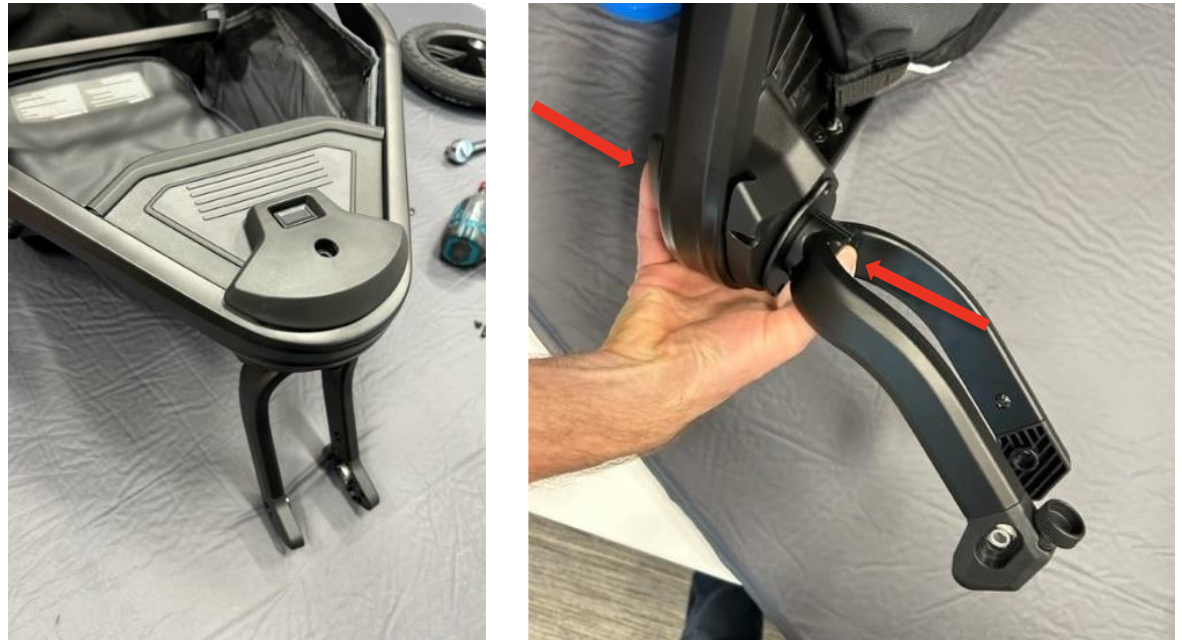
Begin with the plastic cover parts. Be careful to align the cover with other parts in the assembly. Reinstall the (6) Philips head screws on the underside of the plastic cover parts.
/07: Reassemble the fork system.
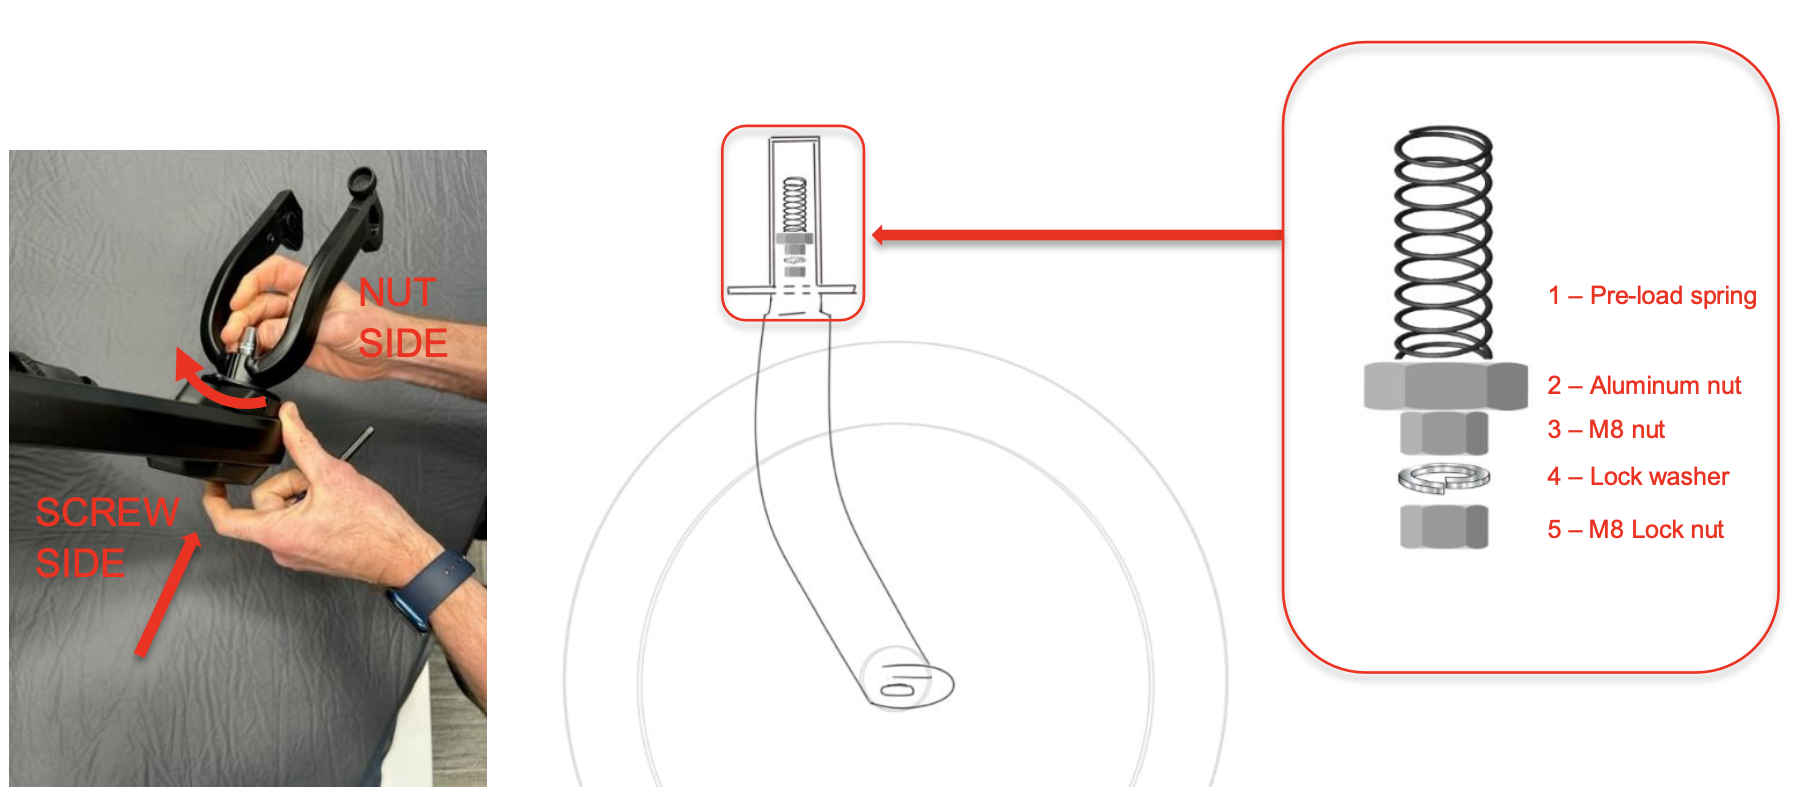
Insert the new (partially threaded) M8 bolt and hold it in place, then insert the other parts from underneath (into the fork steer tube). The parts should be inserted in the order shown in Figure 18 in 3 separate steps:
Insert the spring inside the steer tube and thread the large Aluminum nut onto the M8 bolt. Tighten the M8 bolt until the slop is removed between the swivel fork and the bearings. Do not compress the spring beyond 1-2 revolutions.
Install the first M8 nut (not the M8 lock nut). Then, while keeping the top screw stationary, tighten the nut until you feel resistance. Do not over tighten this nut, it should only be finger tight.
Insert the split washer and M8 lock nut. Then use the tools to tighten fully.
/08: Reinstall the wheel.
Spread the fork to slip the wheel in place. Re-install the washers, axle screws and tighten using 2x M4 hex wrenches.
Refer to the wheel pre-load tuning guide to fine tune your &Jog's steering.
