&Jog / &Roll Lower Rear Frame ReplacementUpdated 5 months ago
REPAIR GUIDE
UPDATED MARCH 2024
Required Tools
- 4mm hex wrench (x2)
- 2mm hex wrench (&Jog Only)
- Flat head screwdriver
- Phillips head screwdriver
- Rubber mallet
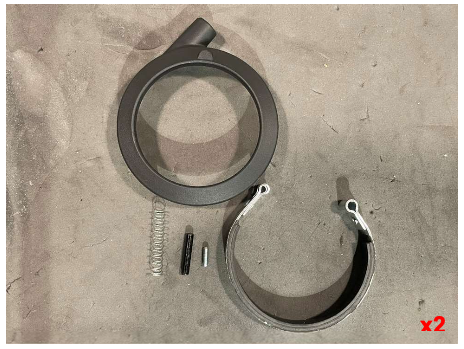
Kit Contents
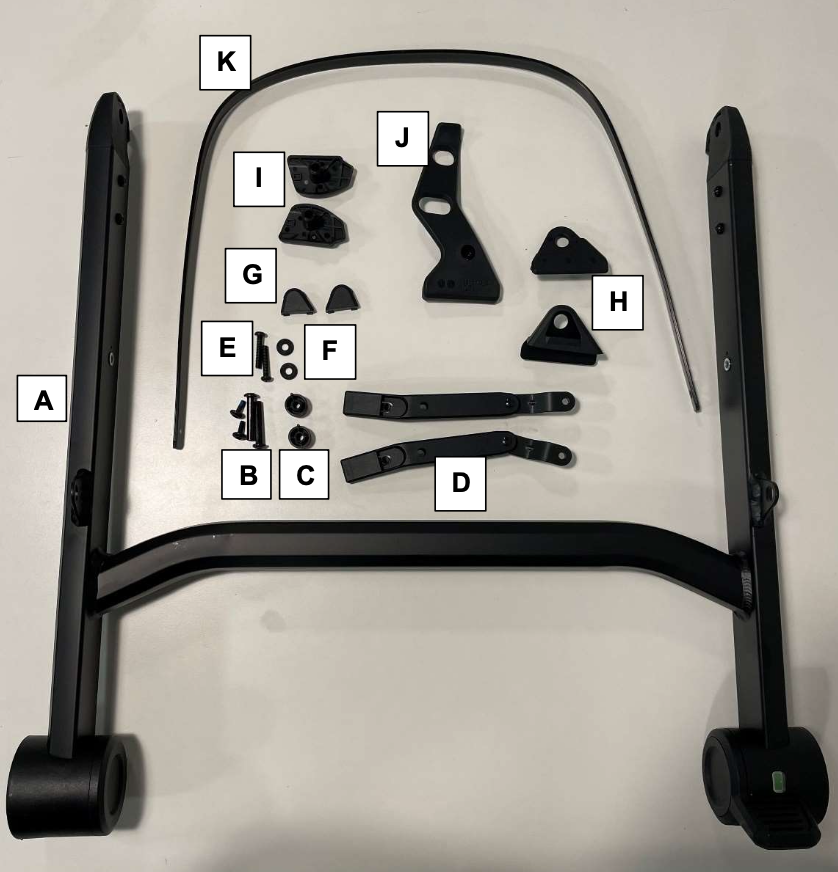
A. Rear Leg Assembly
B. 2x Binding Bolts
C. 2x Storage Basket Mount Spacers
D. 2x Storage Basket Mounts
E. 2x M5 bolts
F. 2x Washers
G. 2x Shock Mount Caps
H. 2x Shock Mount Covers
I. 2x Fold Bushings
J. Storage Latch
K. Storage Basket Stiffener
Procedure
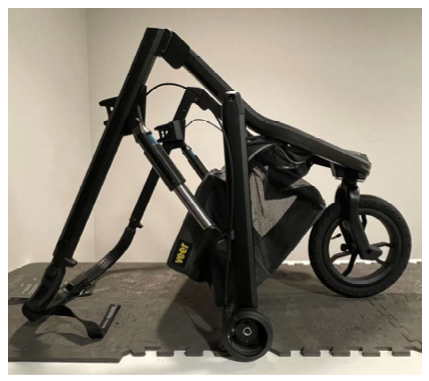
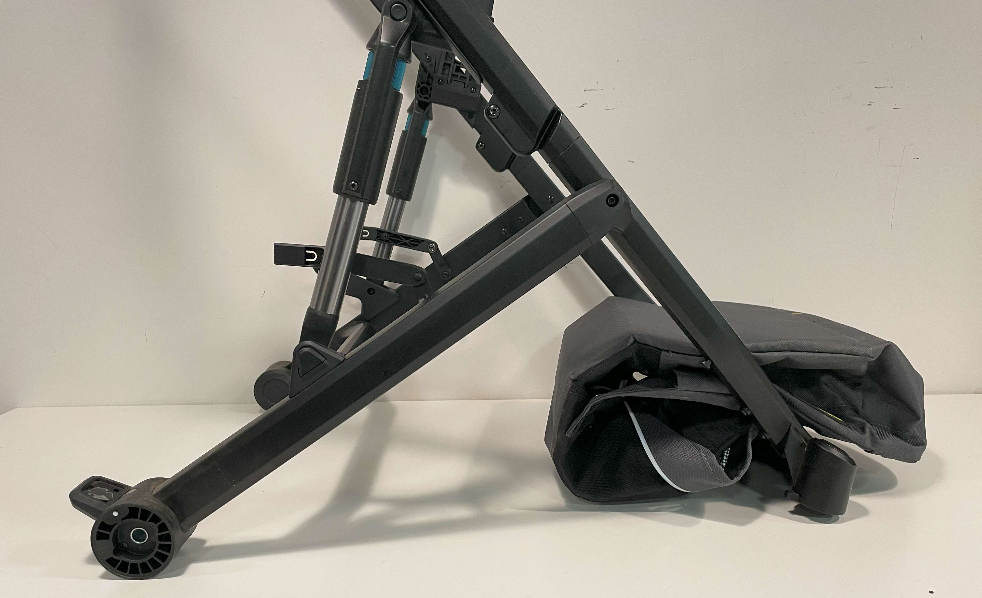
/01: Place your &Jog or &Roll frame in a semi-folded position as shown.
For &Roll, move to Step 7.
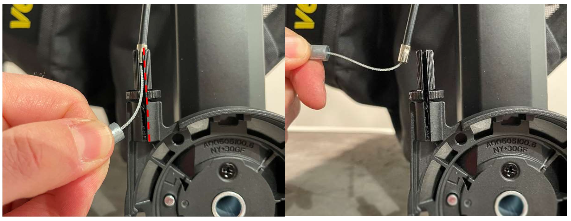
/02: (&Jog only) Pry the rear wheel hub cover off with a flat head screwdriver.
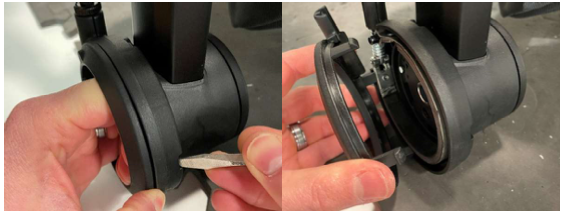
/03: (&Jog only) Remove the pin, then remove the set screw using the 2mm hex wrench. Remove the brake ring and spring. Repeat on the other hub.
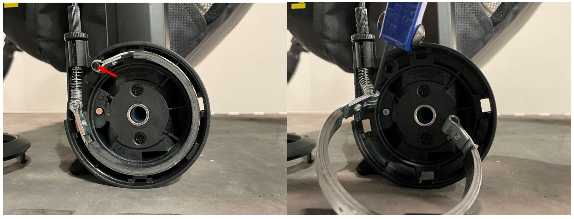
/04: (&Jog only) IMPORTANT! Set aside all components for both hubs shown in a safe place.
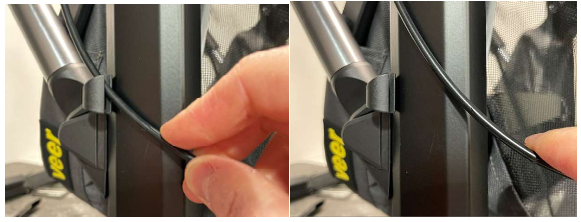
/05: (&Jog only) Align the slot in the barrel adjuster with the slot in the locknut and slide the cable out through the slot.
/06: (&Jog only) Pull the cable housing out of the cable retainer on the frame.
/07: Remove the basket by separating the velcro, releasing the snap, and releasing the stiffener with the flathead screwdriver.
/08: Tuck the basket out of the way.
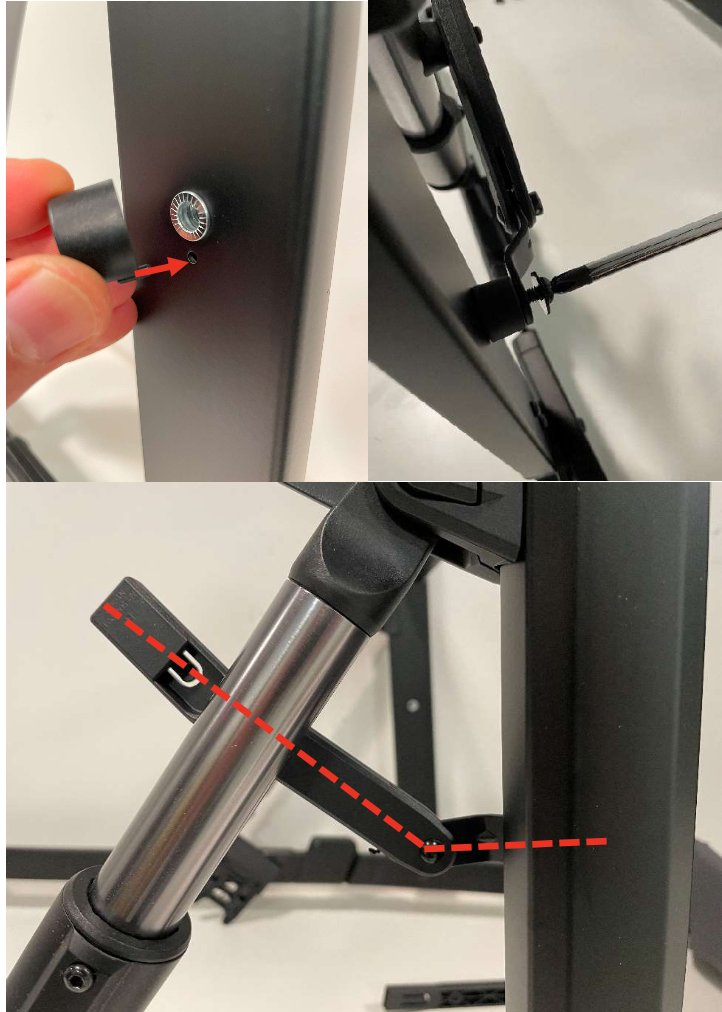
/09: Remove the shock mount caps using the flathead screwdriver. Both plastic cap and cover will be replaced with new components during re-assembly, so it is OK if they get damaged in this step.
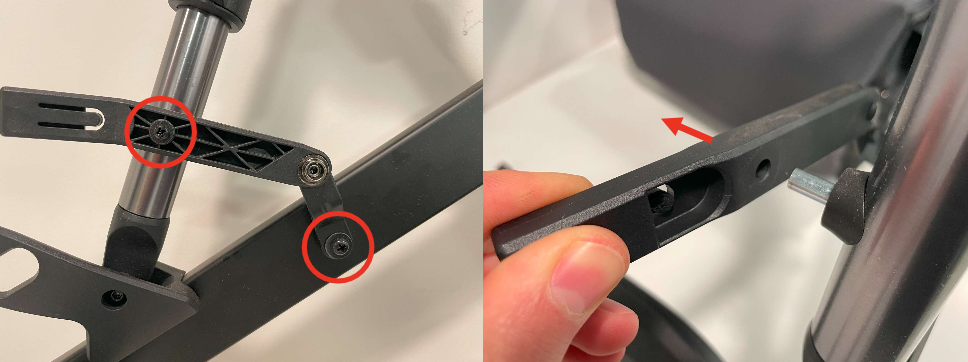
/10: Remove the 2 screws from both basket mounts using the Phillips head screwdriver and slide the mount off the bushing on the shock. IMPORTANT: Set aside the bolts that are removed from the shock. They will be used again during re-assembly.
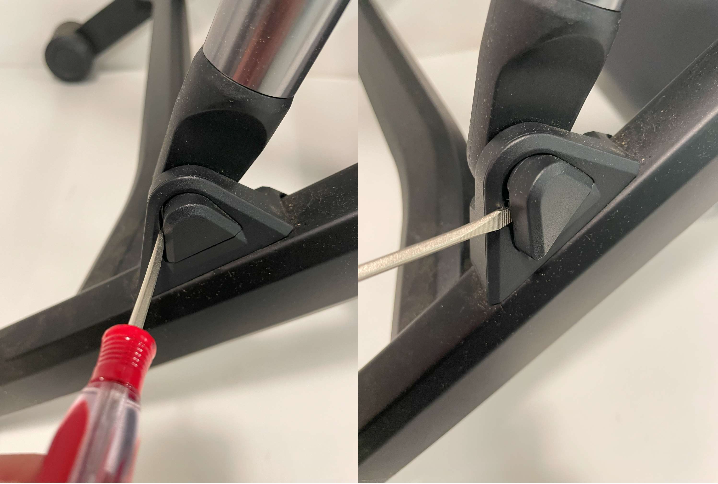
/11: Using the two hex wrenches, remove the binding bolts that secure the legs to the frame, but do not separate the legs from the frame.
/12: Using the two hex wrenches, remove the binding bolts that secure the shock to the legs. CAREFUL: Support the frame while performing this step to prevent it from falling. IMPORTANT: Set the binding bolts aside and note that one is shorter than the other. They will be used again during re-assembly.

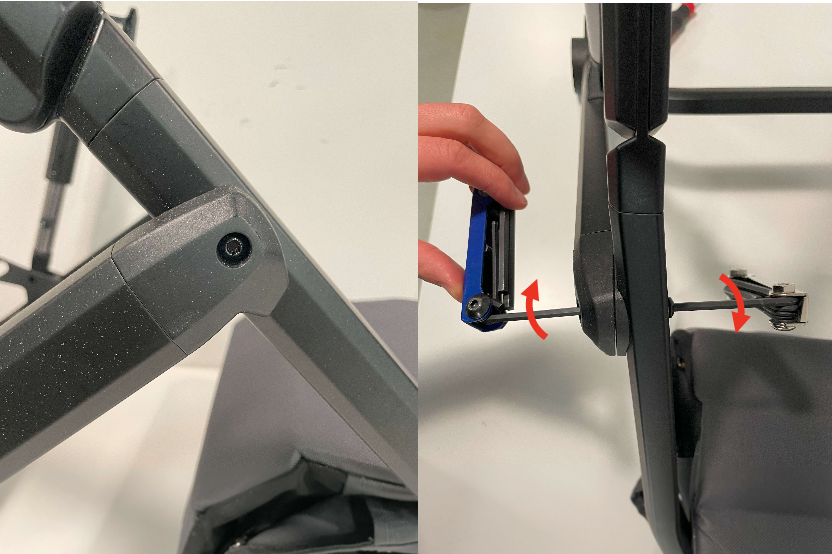
/13: Separate the shocks from the legs and remove the covers. CAREFUL: Support the frame while performing this step to prevent it from falling.
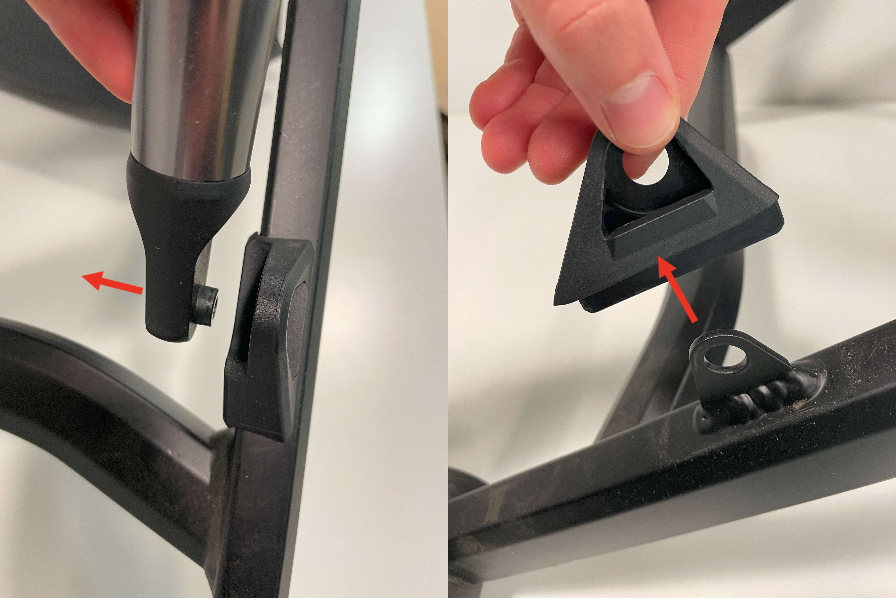
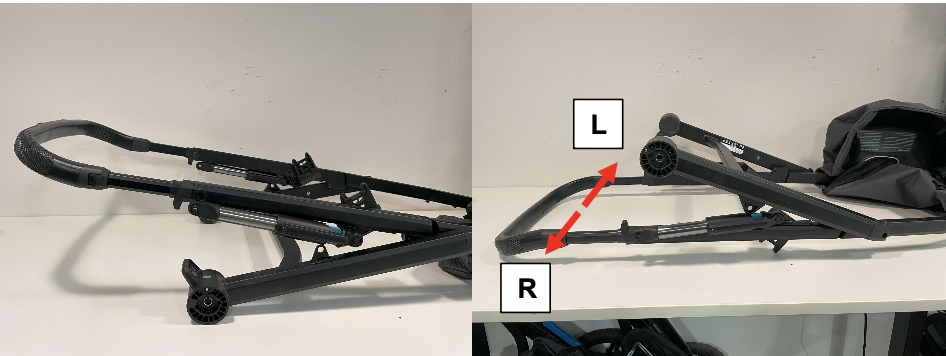
/14: With the frame collapsed, flip the frame over. With the frame oriented as shown, note the LEFT and RIGHT sides in the image below. This will be important during re-assembly. Each component has an “R” or “L” indicating the side on which it should be assembled.
/15: Remove the legs from the frame, then remove the fold bushings.

/16: Insert the new fold bushings (I). The RIGHT bushing is shown in the image.
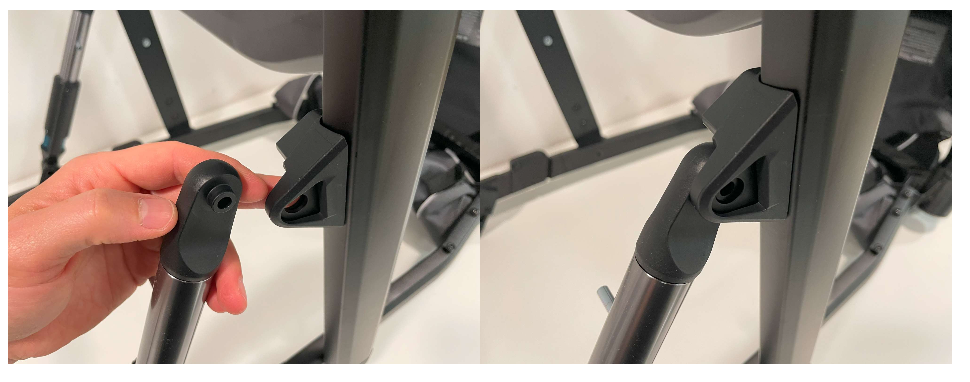
/17: Assemble the new legs (A), and secure with binding bolts (B). NOTE: The female side should be inserted from the inside of the frame, while the male side should be inserted from the outside as shown.
/18: Place the left and right shock mount covers (H) on the frame mounting tabs, then insert the shock mounting boss into the hole in the mounting tabs. The RIGHT mount cover is shown in the image. CAREFUL: Support the frame while performing this step to prevent it from falling.
/19: On the RIGHT SIDE ONLY, assemble the storage latch (J). Then, finish assembly of both sides by re-inserting the binding bolts that were set aside in step 6. The female side should be inserted with the washer from the outside of the frame as shown. NOTE: The longer binding bolt is for the RIGHT side (i.e. the side with the storage latch) and the shorter binding bolt is for the LEFT side.

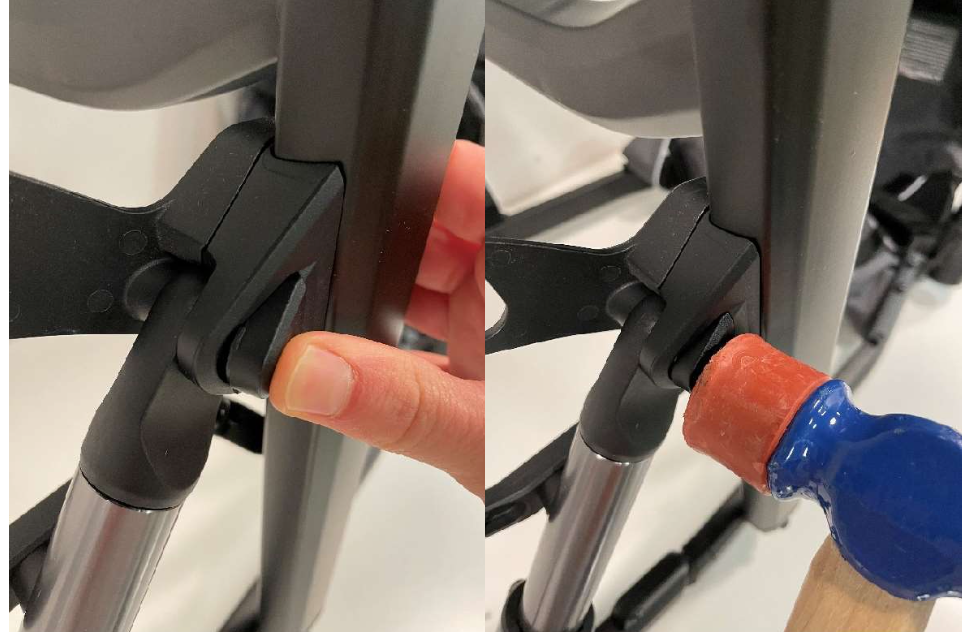
/20: Assemble the shock mount caps (G) by placing them over the binding bolt head and using the or mallet to snap them in place.
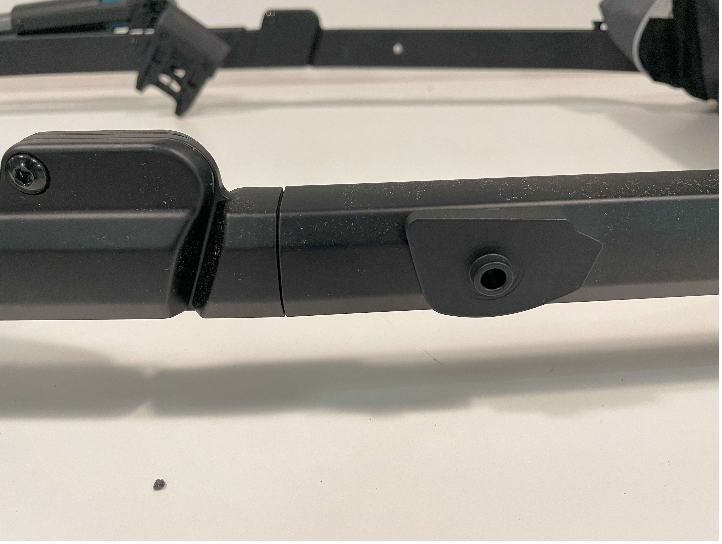
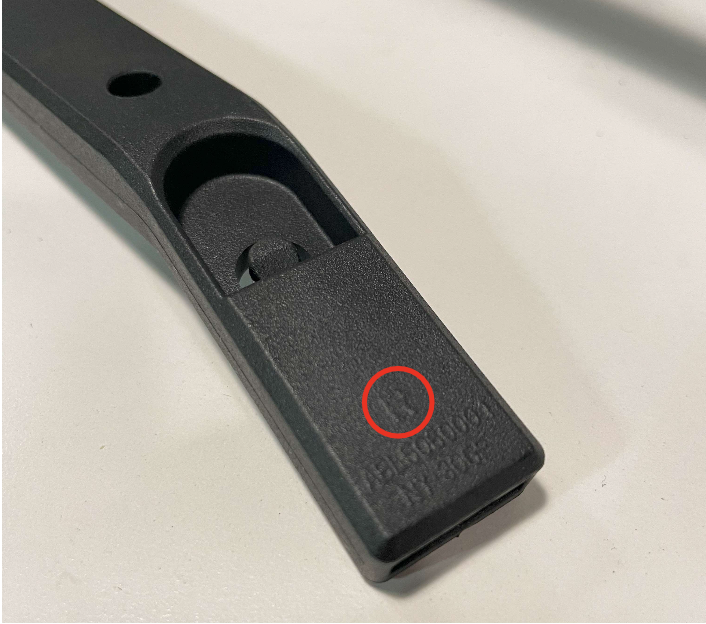
/21: Identify the right and left storage basket mounts (D). The “R” and “L” can be difficult to see on these parts. The photo below shows the location of the letter.
/22: Slide the storage basket mount over the pivot bushing and secure using the bolts that were set aside in step 4.
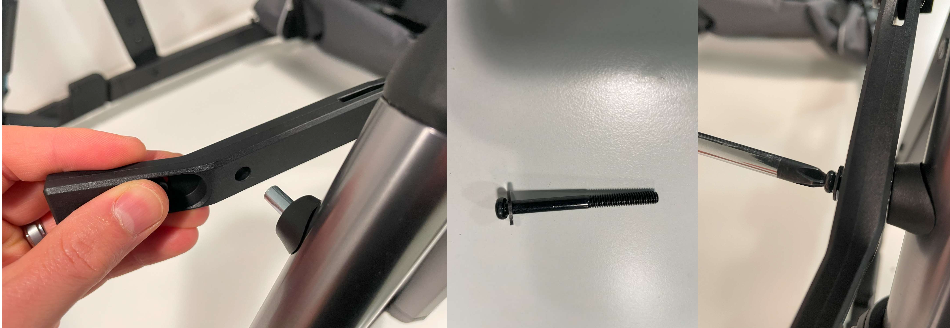
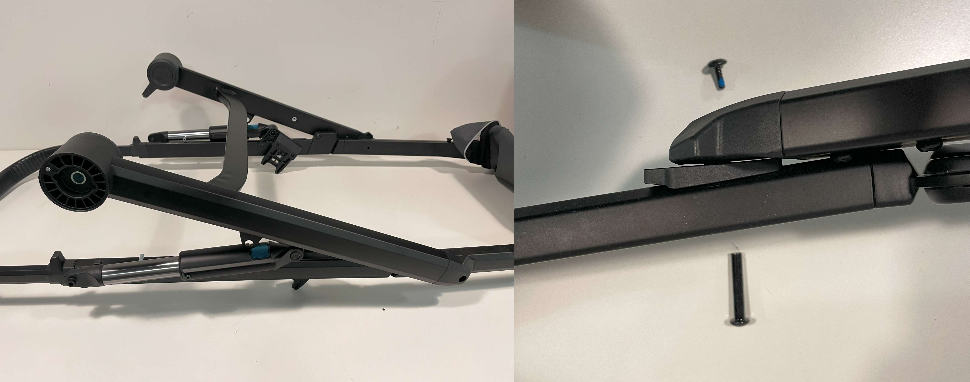
/23: Insert the storage basket mount spacer (C) by lining up the peg with the small hole in the frame. Secure the storage basket mount to the frame using the M5 bolts (E) and washers (F). IMPORTANT: Ensure that the basket mount is angled as shown in the image or the stroller will not fold properly.
/23: (&Jog only) Reverse steps 2-6 to reinstall the deceleration brakes.
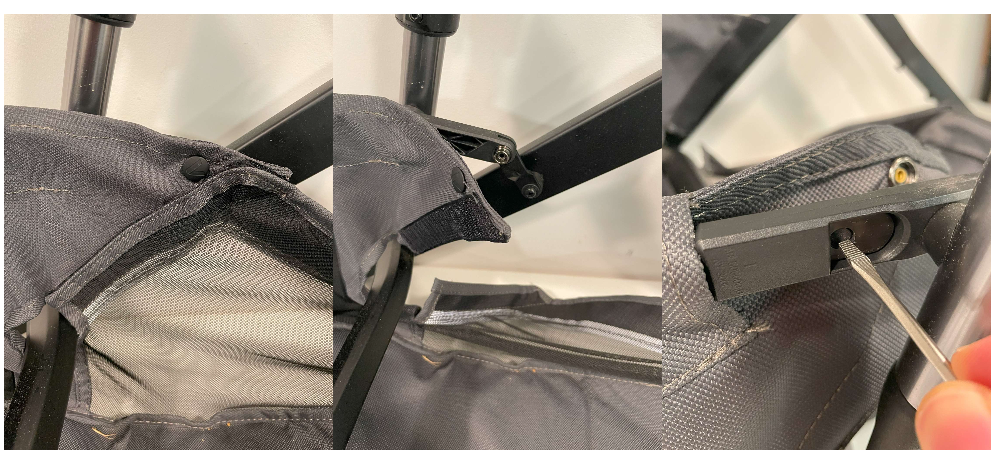
/24: Reassemble the storage basket by sliding the stiffener into the storage basket mounts, re-snapping the button, and re-attaching the velcro. NOTE: It is not necessary to use the new storage basket stiffener (K) unless yours is broken.
REPAIR COMPLETE!