Cruiser Brake Cable ReplacementUpdated 18 days ago
REPAIR GUIDE
UPDATED OCT 2024
Required Tools
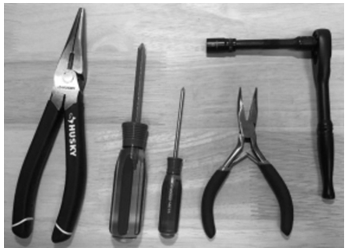
- Needle nose pliers - medium and small if available
- #1 Phillips head screwdriver
- #2 Phillips head screwdriver
- M8 Socket wrench with extender
Replacement Parts Required
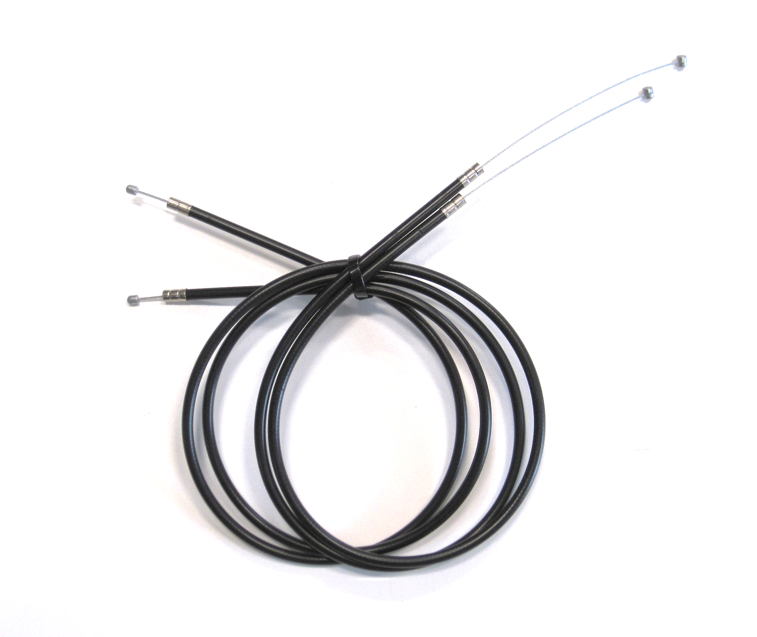
- Brake cable kit
Procedure
NOTE: This procedure will be easier if done with all the wheels removed from the Cruiser. This guide is broken in 2 parts, first the brake cable replacement at the wheel side, later the brake cable ends at the brake side. Each part can be done in parallel, in other words do each part for both sides of the cruiser at the same time.
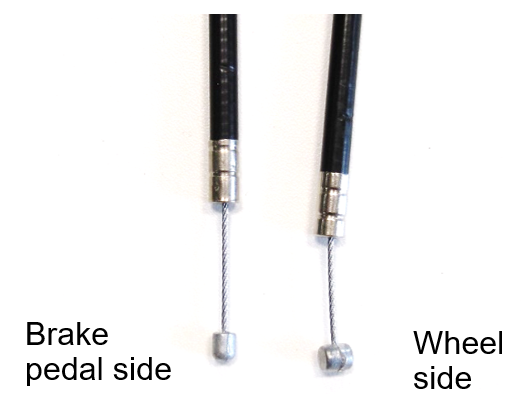
Be aware of the cable ends in the kit have different ends: The brake pedal side has a bullet shaped cable end vs the wheel side has a barrel shaped cable end.
PART 1 - Cable replacement on wheel side.
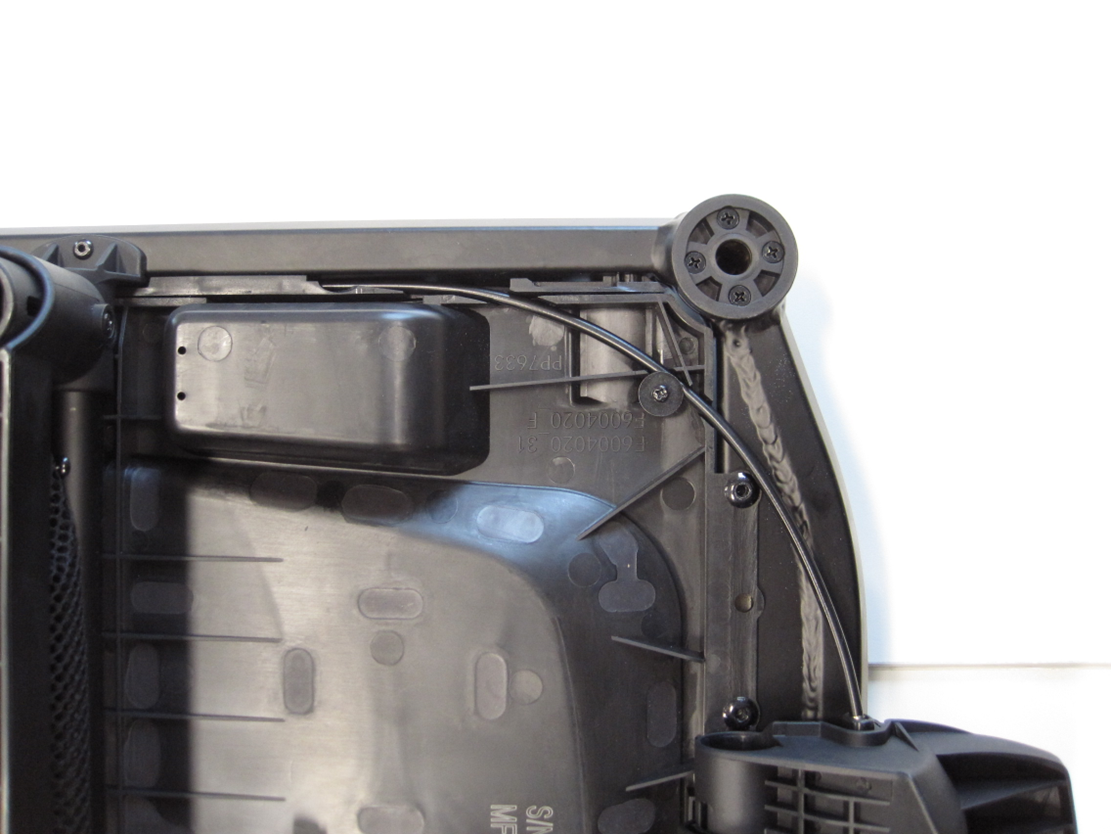
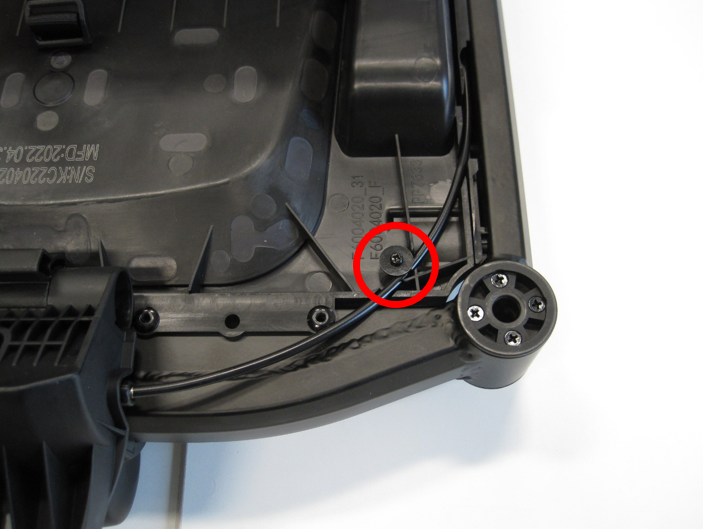
/01: Loosen the cable routing screw pictured below.
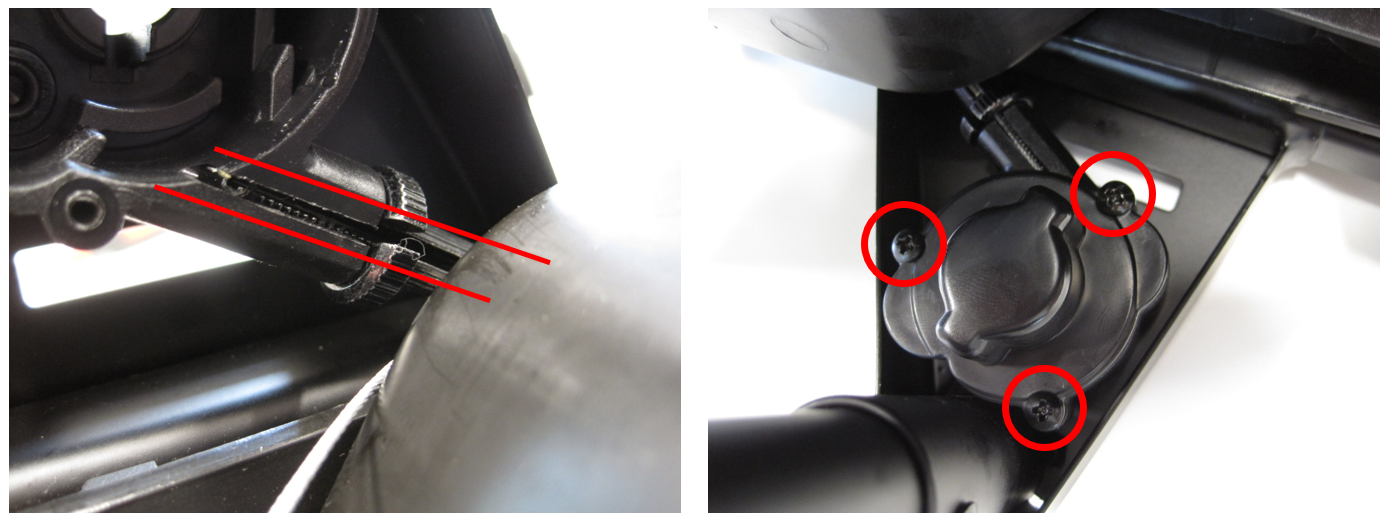
/02: Align the slit on the brake cable housing, and the adjuster mechanism so that the cable can eventually come out. (use the pliers if needed)
Remove the 3 screws of the wheel side brake cap.
Note: There's a spring behind that cap which may come out as soon as the cap is undone.
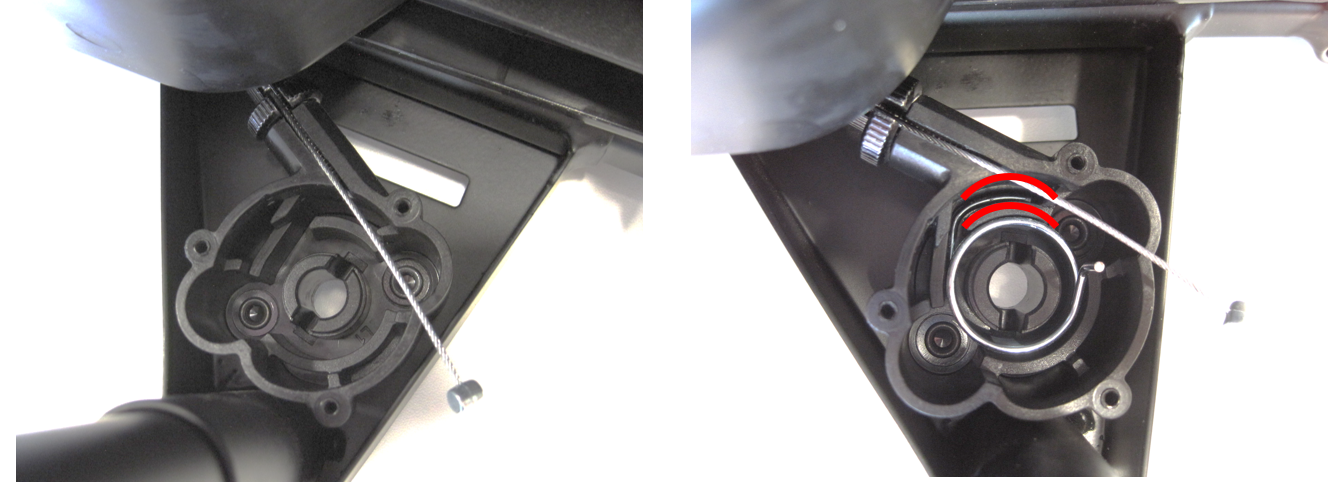
/03: Remove the spring, the brake pin and the cable spool, by pulling them out. The cable will remain attached to the cable spool

/04: Remove the cable from the cable spool by pulling it out of its groove and cable end pocket. It is possible that the spring below the spool comes out with the spool. Re-install, making sure to align the curved end in the curved area of the housing.
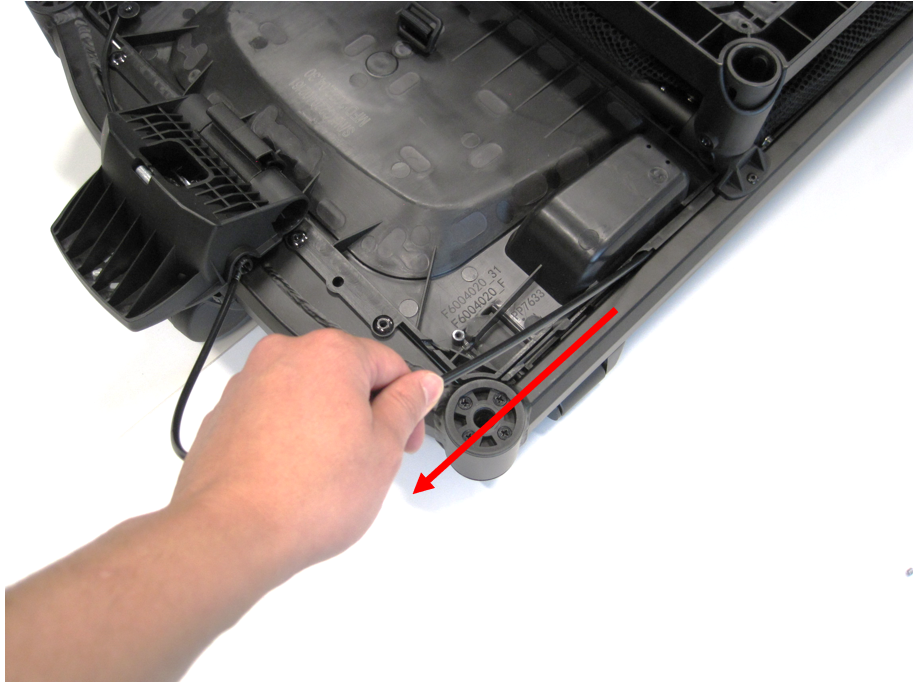
/05: Pull the cable out
Make sure the steel part of the cable is out of the housing when pulling on the cable.
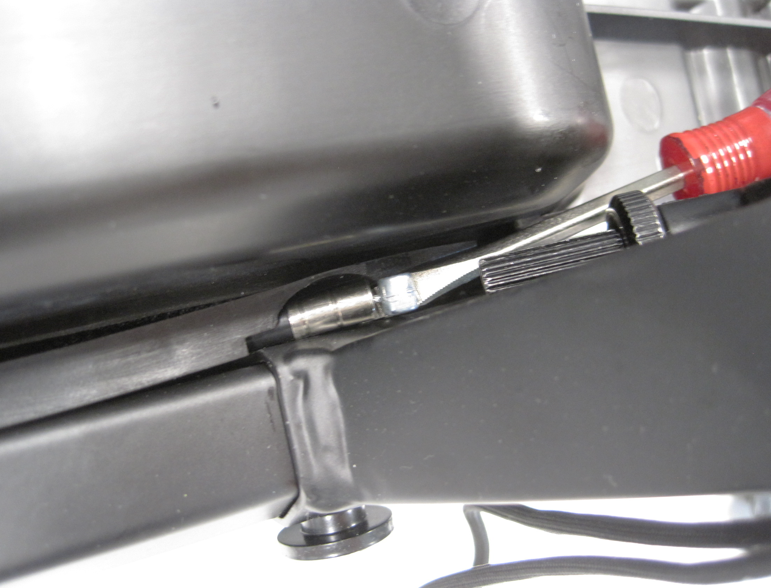
/06: Insert the new cable through the same channel in the frame. It may be difficult to get the cable end to slide out of the channel near the wheel. Use a screw driver and pliers to help guide it out.
/07: Be mindful of the orientation of the cable spool.
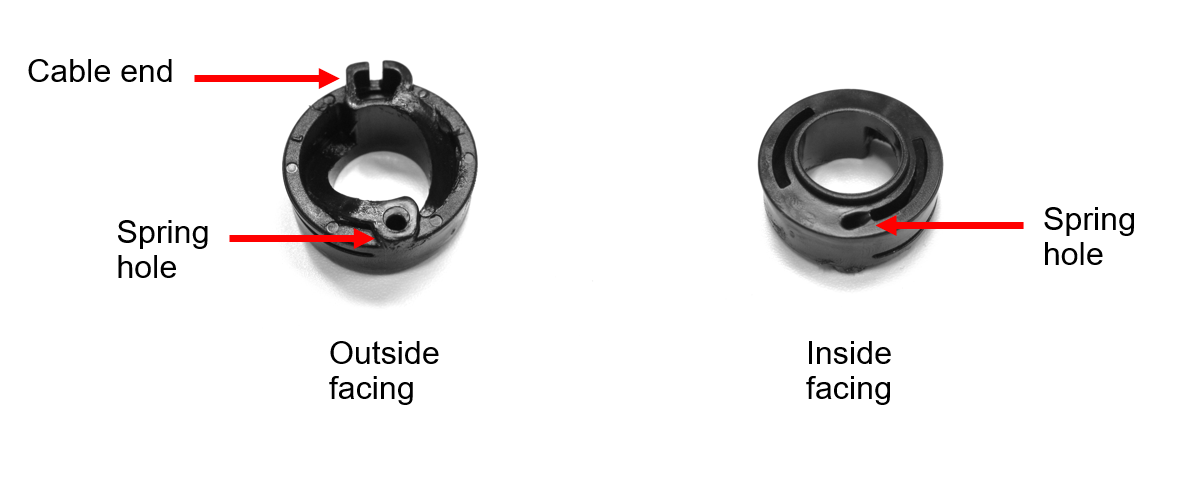
/08: Insert the cable through the housing on the cruiser. Install the cable end to the spool and make sure to wrap the cable around the groove on the spool. Then re-install the spool by inserting the spring end into the inside facing hole of the spool. This step can be difficult as you will have to add a bit of tension on the spring so that everything aligns as pictured. Use the pliers if needed. You should be able to press the spool into place.

/09: Insert the brake pin, making sure to align the ears with the notches in the housing. Insert the spring.
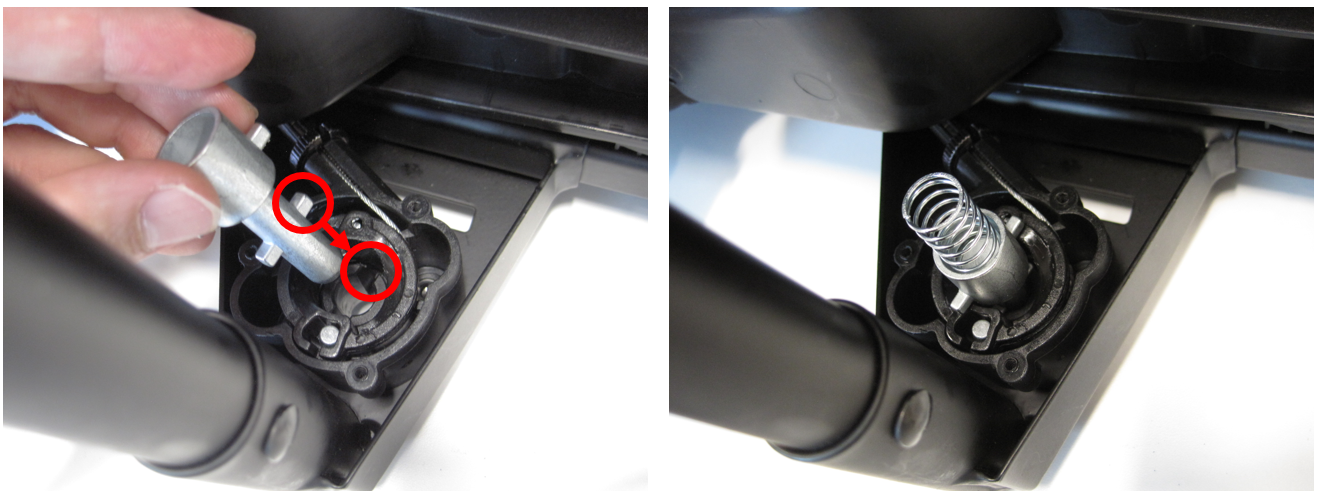
/10: Install the cap back on being mindful of the alignment with the screws.
PART 2 - Cable replacement on brake side.
/01: Remove brake pedal pivot bolt using a M8 socket wrench and #2 Phillips screwdriver.
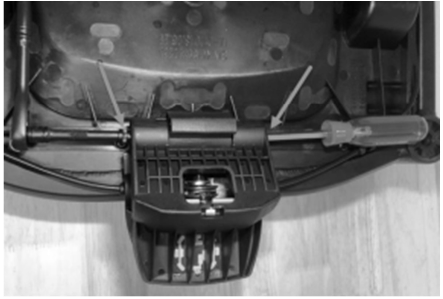
/02: Release brake cable from brake pedal.
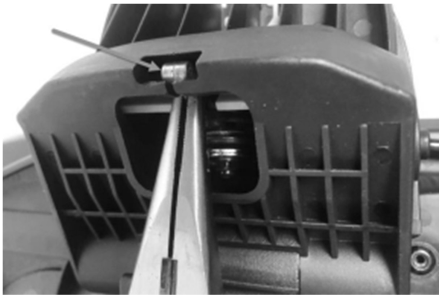
/03: Remove brake pedal then #8 screws highlighted below.
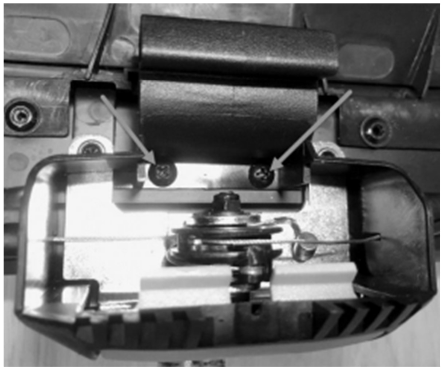
/04: Remove #6 screws highlighted below.
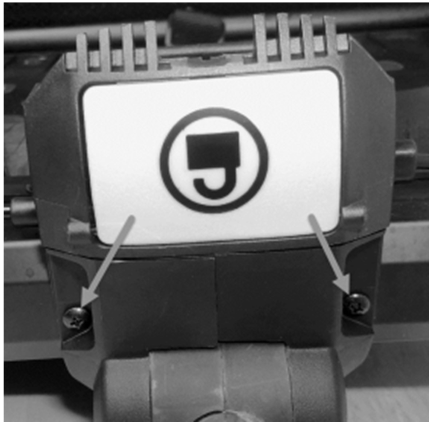
/05: Lift the brake housing off your Cruiser.
You will need to pull on the brake cables to release them from the brake housing. BE CAREFUL to restrain the brake release spring to prevent it from flying free.
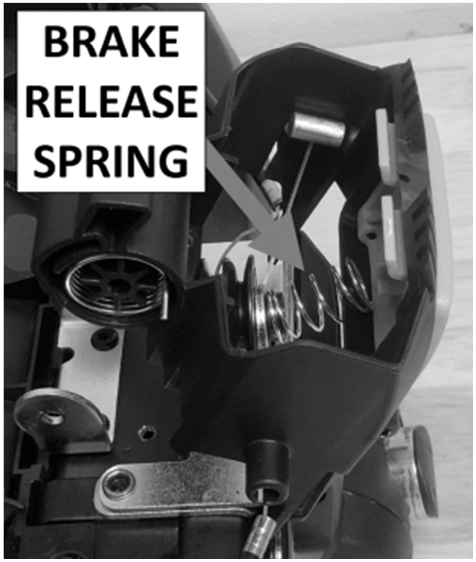
/06: Loosen and remove the bolt, plastic cup washer, nut, and washer using the M8 socket and #2 Phillips screwdriver.
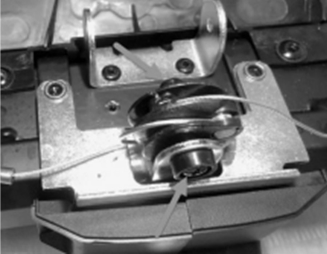
/07: Remove the brake cable spool and disconnect brake cables.
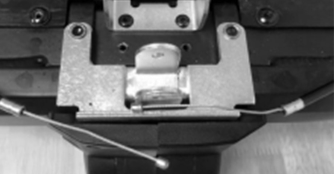
/08: Pull the old cables away and discard. Position the new ones as shown in the picture below.
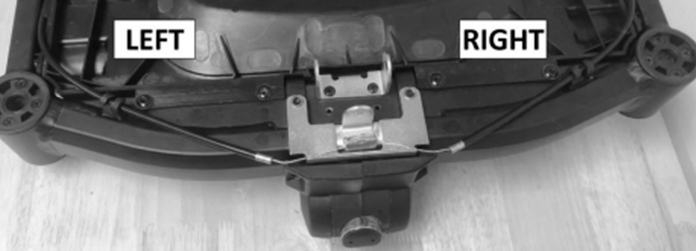
/09: Orient the cable spool as shown in the picture below and connect the right and left brake cables. Loop around the cables inside the grooves on the spool.
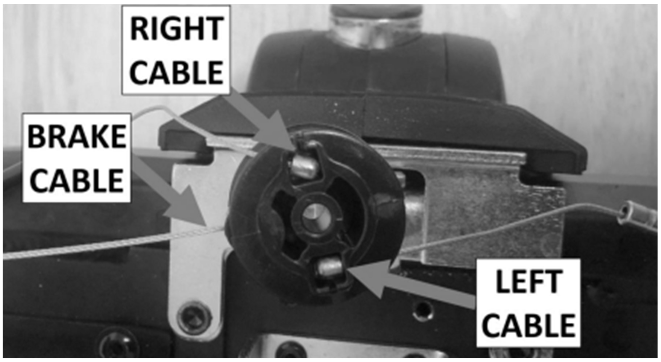
/10: Orient and slide the cable spool into its mounting bracket as shown in the picture below.
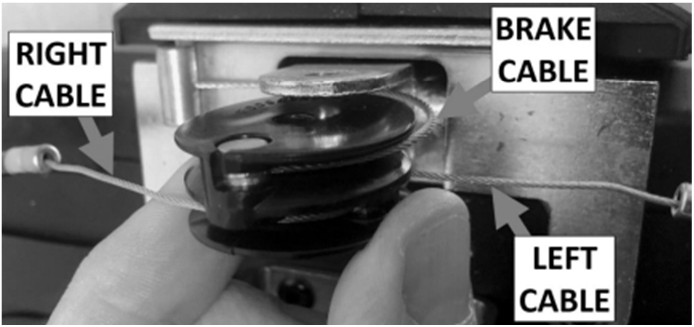
/11: Install the plastic cup washer onto the M5 x 28 bolt and insert through the spool bracket and the spool. Secure with the M5 washer and M5 lock nut.
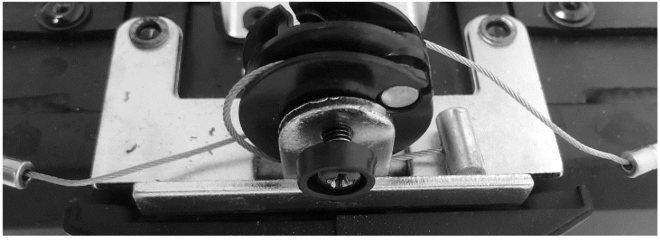
/12: Tighten the M5 lock nut.
NOTE: The cable spool must be able to rotate freely, but the gap between the cable pulley and its mounting bracket must not be greater than the thickness of 3 sheets of paper.
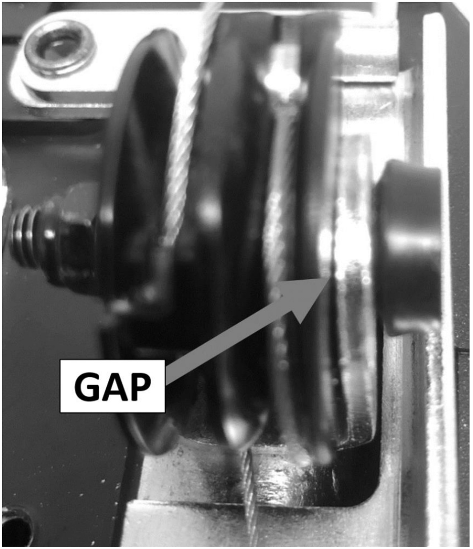
/13: Slide the brake release button spring onto the plastic cup washer.
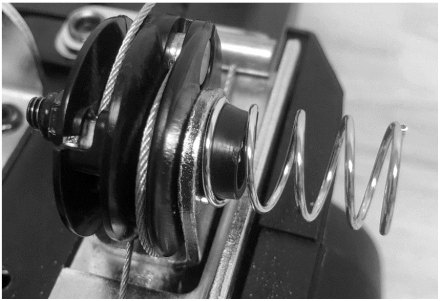
/14: Insert torsion springs into the brake housing as shown.
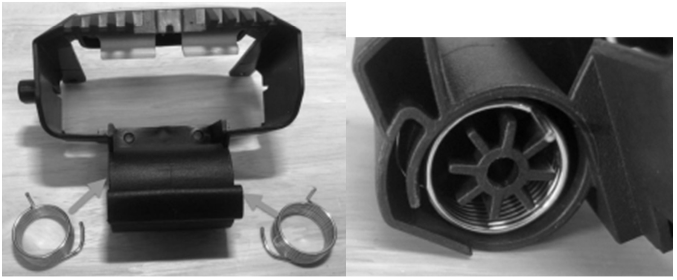
/15: Slide the brake release housing onto your Cruiser.
Make sure the brake release button spring is positioned on its positioning cross on the inside surface of the brake release button as shown in the picture below.
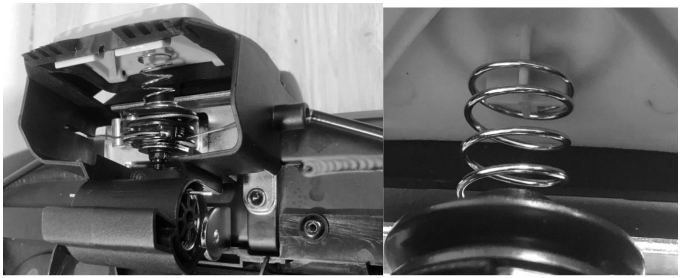
/16: The brake release housing should be positioned on your Cruiser as shown.
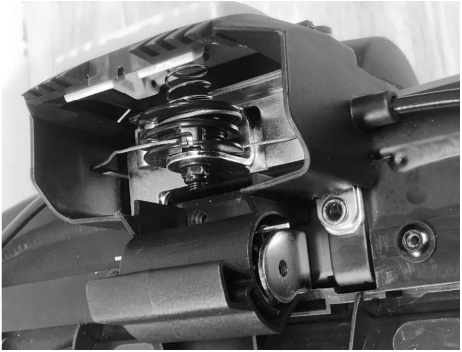
/17: Install the 2x #8 screws and tighten.
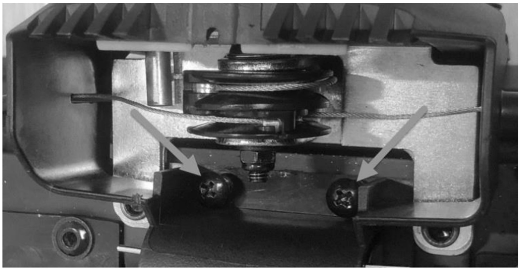
/18: Install the 2x #6 screws and tighten.
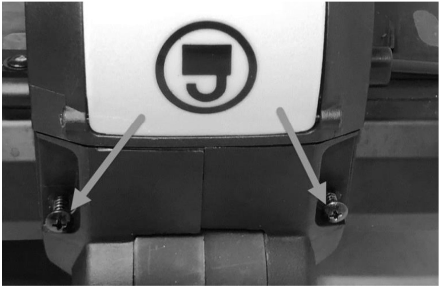
/19: Verify the brake release button moves freely.
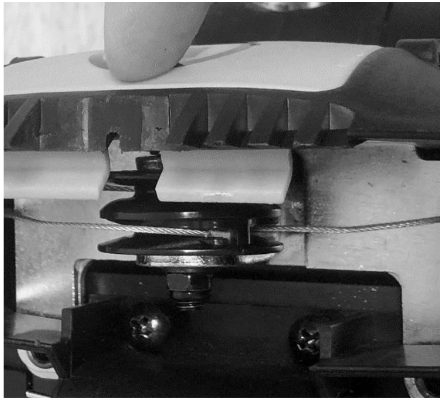
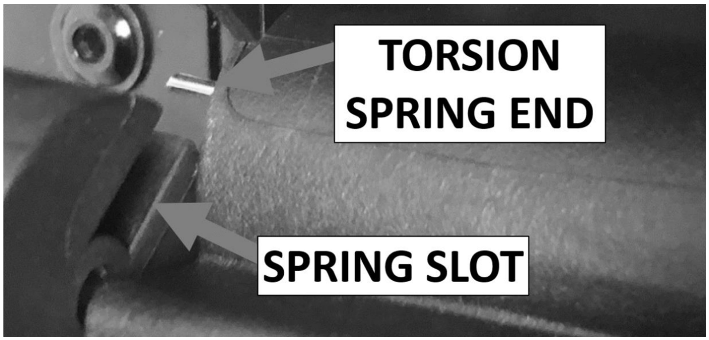
/20: Position the brake pedal so the ends of the torsion springs slide into the spring slots on the brake pedal. Verify both torsion spring ends are positioned within these slots.
/22: Place a M5 washer onto the M5 x 82 bolt and slide the bolt through the brake pedal. Install a second M5 washer on the end of the M5 x 82 bolt and then install the M5 acorn nut. Tighten the M5 acorn nut and verify the brake pedal rotates freely.
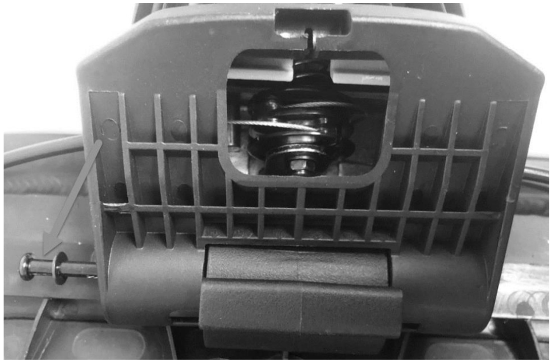
/23: Grab the brake cable with a needle nose pliers and fish it through the opening and place the brake cable and place it in its receptacle.
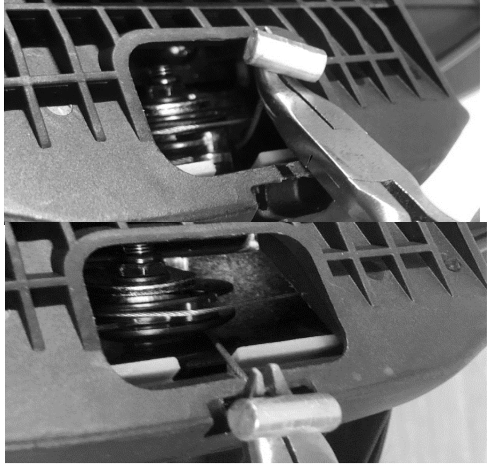
/24: Verify proper assembly and brake pedal operation.
- Brake cable is positioned correctly as shown in the picture below.
- Brake pins extend and retract completely. If the pins do not retract completely the cable pulley bolt is too tight and not rotating freely. You will have to disassemble the brake pedal system and loosen this bolt.
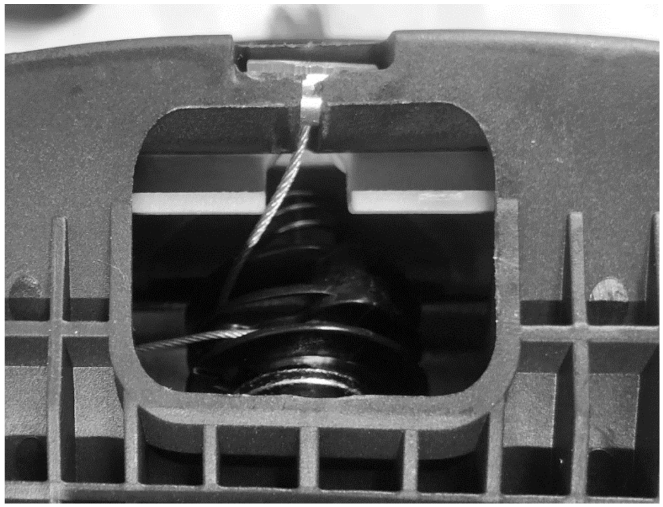
/25: Re-position the cable as shown and install the routing screw. Do a final test of the brakes and tune as needed using the adjustment procedure.
